
Managing your hard drive properly is important for keeping your computer running well and your files organized. Although Windows comes with a built-in Disk Management tool, it’s pretty limited—you can only do basic things like creating or deleting partitions. When it comes to more advanced tasks, like resizing partitions without losing data or merging non-adjacent partitions, it often falls short.
That’s why many people turn to free partition management software. A good partition tool makes it much easier and safer to split a physical drive into separate sections, helping you manage your disk space more effectively and keep everything in order.
Also Read – How to Clone NVME SSD to NVME SSDs
There are several reasons why do you need disk partition software:
Improving Performance: Splitting a hard drive into different sections—such as keeping the operating system on the C drive and personal files on the D drive—can help the system run faster and more efficiently.
Better Data Management: Advanced partition features like resizing and merging make it easier to organize and store growing amounts of data.
Setting Up Multiple Operating Systems: If you want to install another OS, like Windows 11, on the same drive, partitioning is necessary. Partition software allows you to create new partitions quickly and safely.
A good free partition manager is easy to use and offers more features than Windows’ built-in tool, like creating, deleting, formatting, resizing, and merging partitions, without any high cost.
The best partition manager software for Windows
While Windows offers built-in tools like Disk Management and DiskPart for managing partitions, many users find them hard to use because of strict limits and frequent errors. That’s why choosing a reliable Windows partition manager is a smarter option.
Among the many options available, AOMEI Partition Assistant stands out as a top choice, which taps into the disk potential and manages partitions efficiently. It works perfectly on Windows 11, 10, 8, and 7, and offers several key advantages:
More than basic partition tasks: AOMEI Partition Assistant can create, resize, shrink, delete, and format partitions, just like Disk Management. But it also goes further—you can move partitions, merge, split, clone them to another drive, and more.
Boosts PC performance: It includes extra tools like PC Cleaner, large file remover, and options to move installed programs between drives to help speed up your computer.
Protects your data: Complex operations are handled carefully to keep your files safe. Even if you lose data, the software can help recover it. If you want to know how to recover data from HDD, you can follow that tutorial.
Thanks to its clear and user-friendly interface, AOMEI Partition Assistant is well-suited for both beginners and experienced users, making hard drive management much easier and more efficient.
Please note that some advanced features may require an upgrade to a higher edition.
Next, we will guide you through the steps to extend the C drive using AOMEI Partition Assistant. Kindly download the software first, and then follow the instructions below.
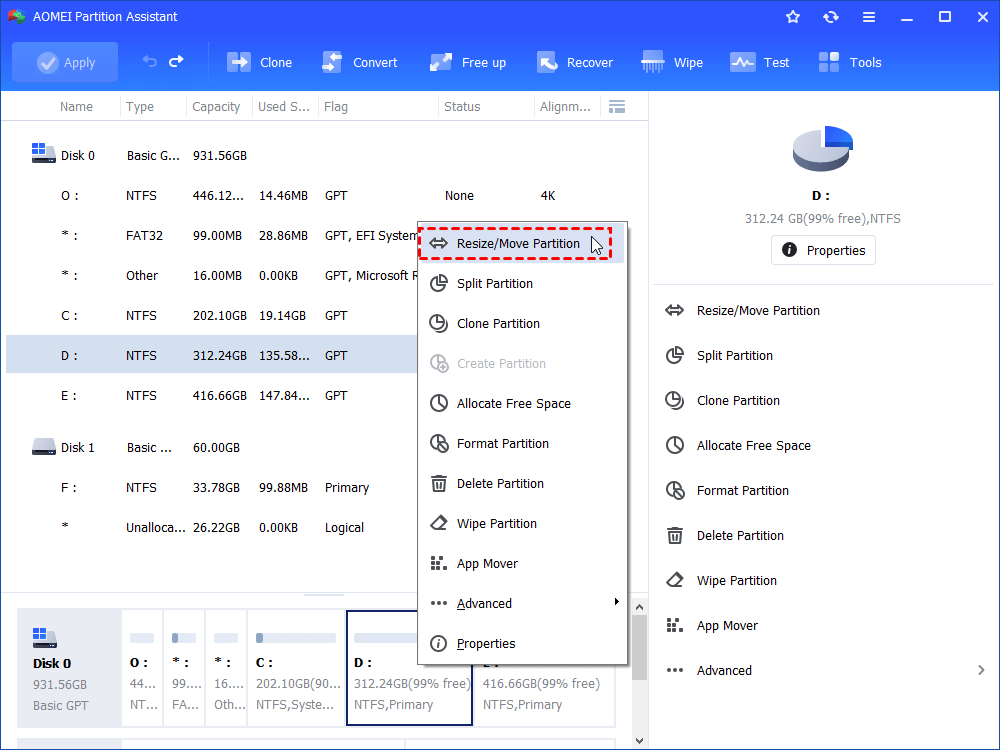
Step 1. Install and launch AOMEI partition software on Windows 10 or 11. At the main interface, right-click the drive (eg: D) from which you plan to take free space to C drive, and select “Resize/Move Partition”.
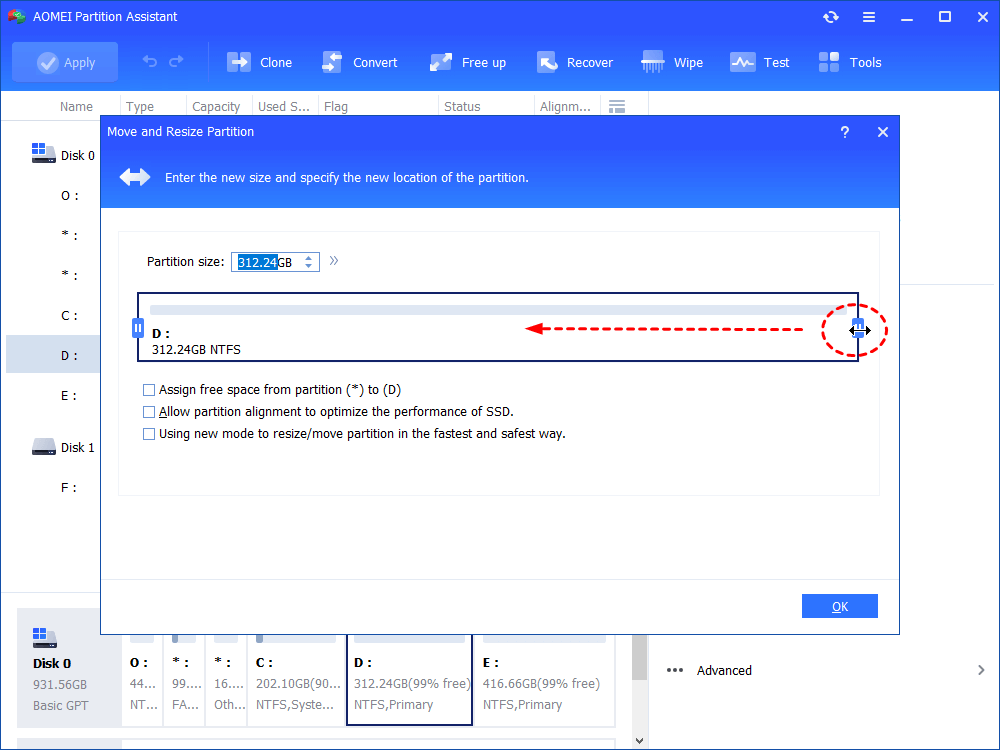
Step 2. In the “Move and Resize Partition” window, you are allowed to adjust partition size at will. Then click “OK”.
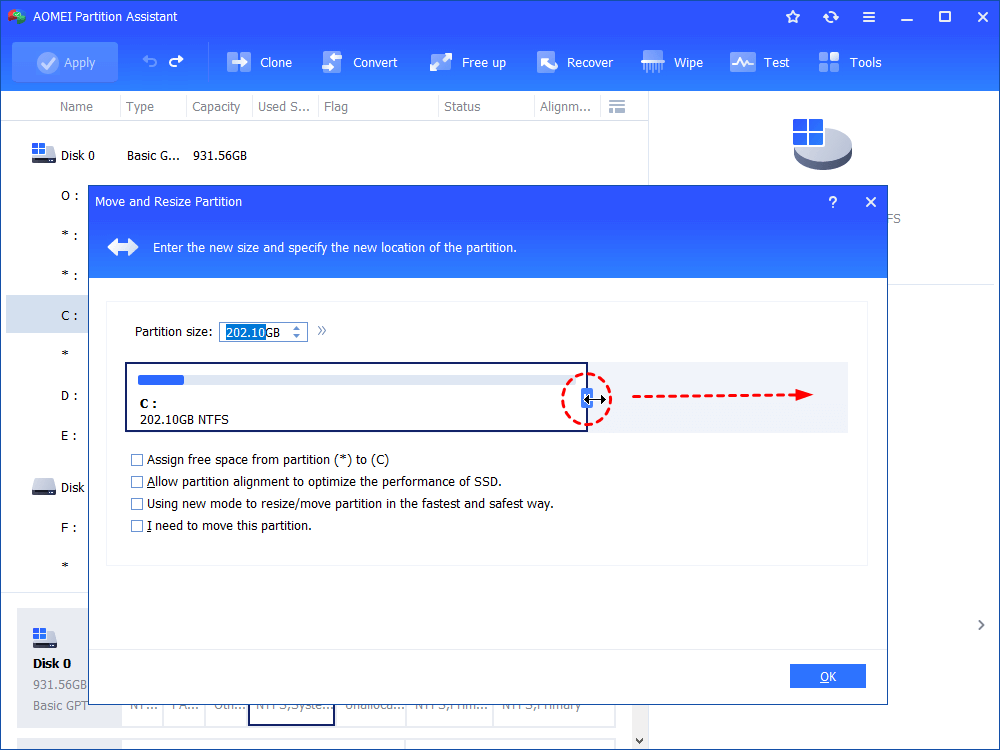
Step 3. After the unallocated space has been generated, right-click C drive and select “Resize Partition”.
Step 4. At the pop-up window, drag the C drive to the right side to extend it using the unallocated space.
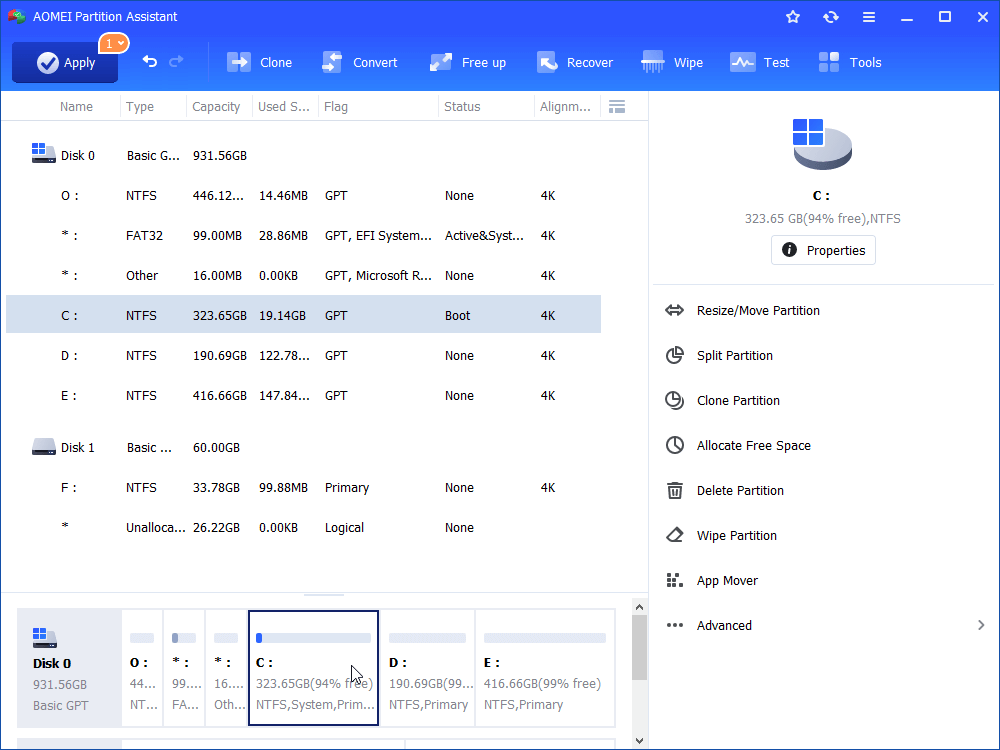
Step 5. After that, you will see the main interface. Here, you can click “Apply” to proceed the process.
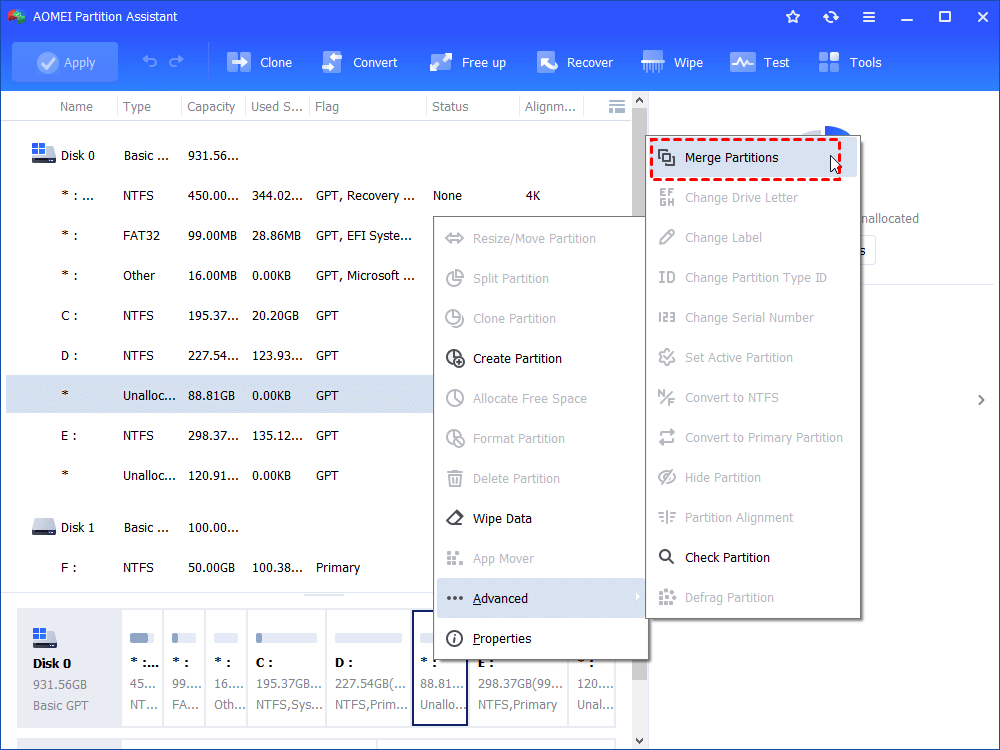
To extend C drive, you can also merge another partition or unallocated space to it via the “Merge Partition” function.
Step 1. Right-click on the partition you need to extend and choose “Advanced” > “Merge Partitions”.
Step 2. Choose the partition and unallocated space, then click “OK”.
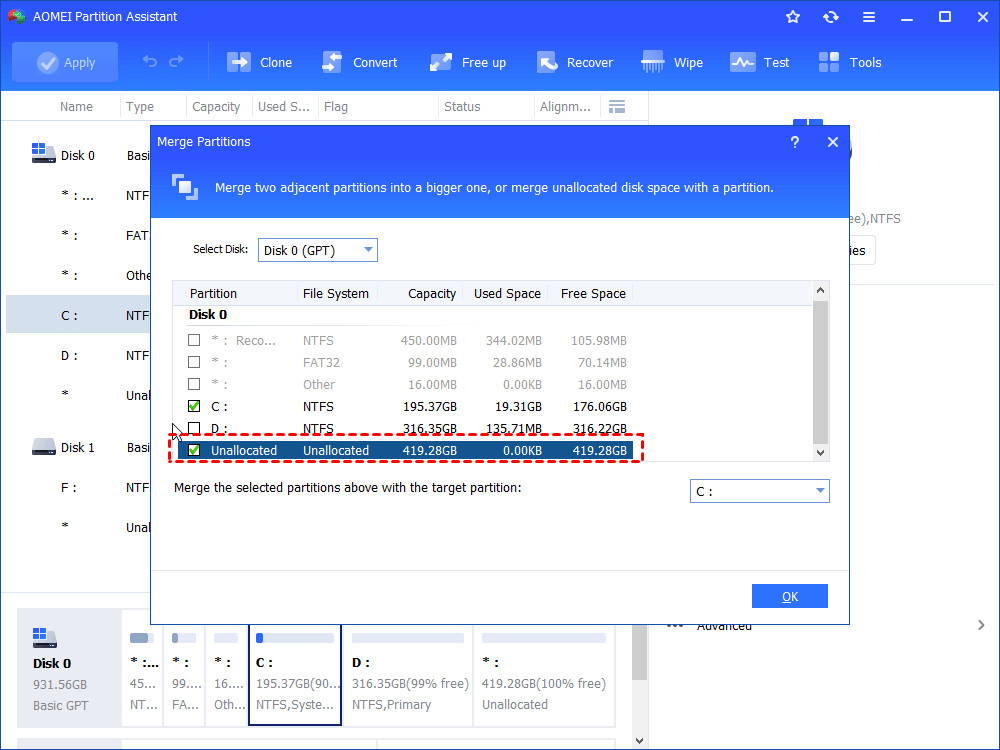
Step 3. Then, you can see the unallocated space has been added to C drive. To save the change, please click “Apply” button in the top left corner.
Conclusion
Overall, having the right partition software can make a big difference in managing your computer’s storage. AOMEI Partition Assistant provides everything you need to handle partitions safely and efficiently. Download it today to simplify your disk management tasks.
Pingback: Free Backup Software to Protect OS and Data in Windows 2025